Pages

Monday 12 September 2011

School Art Auction

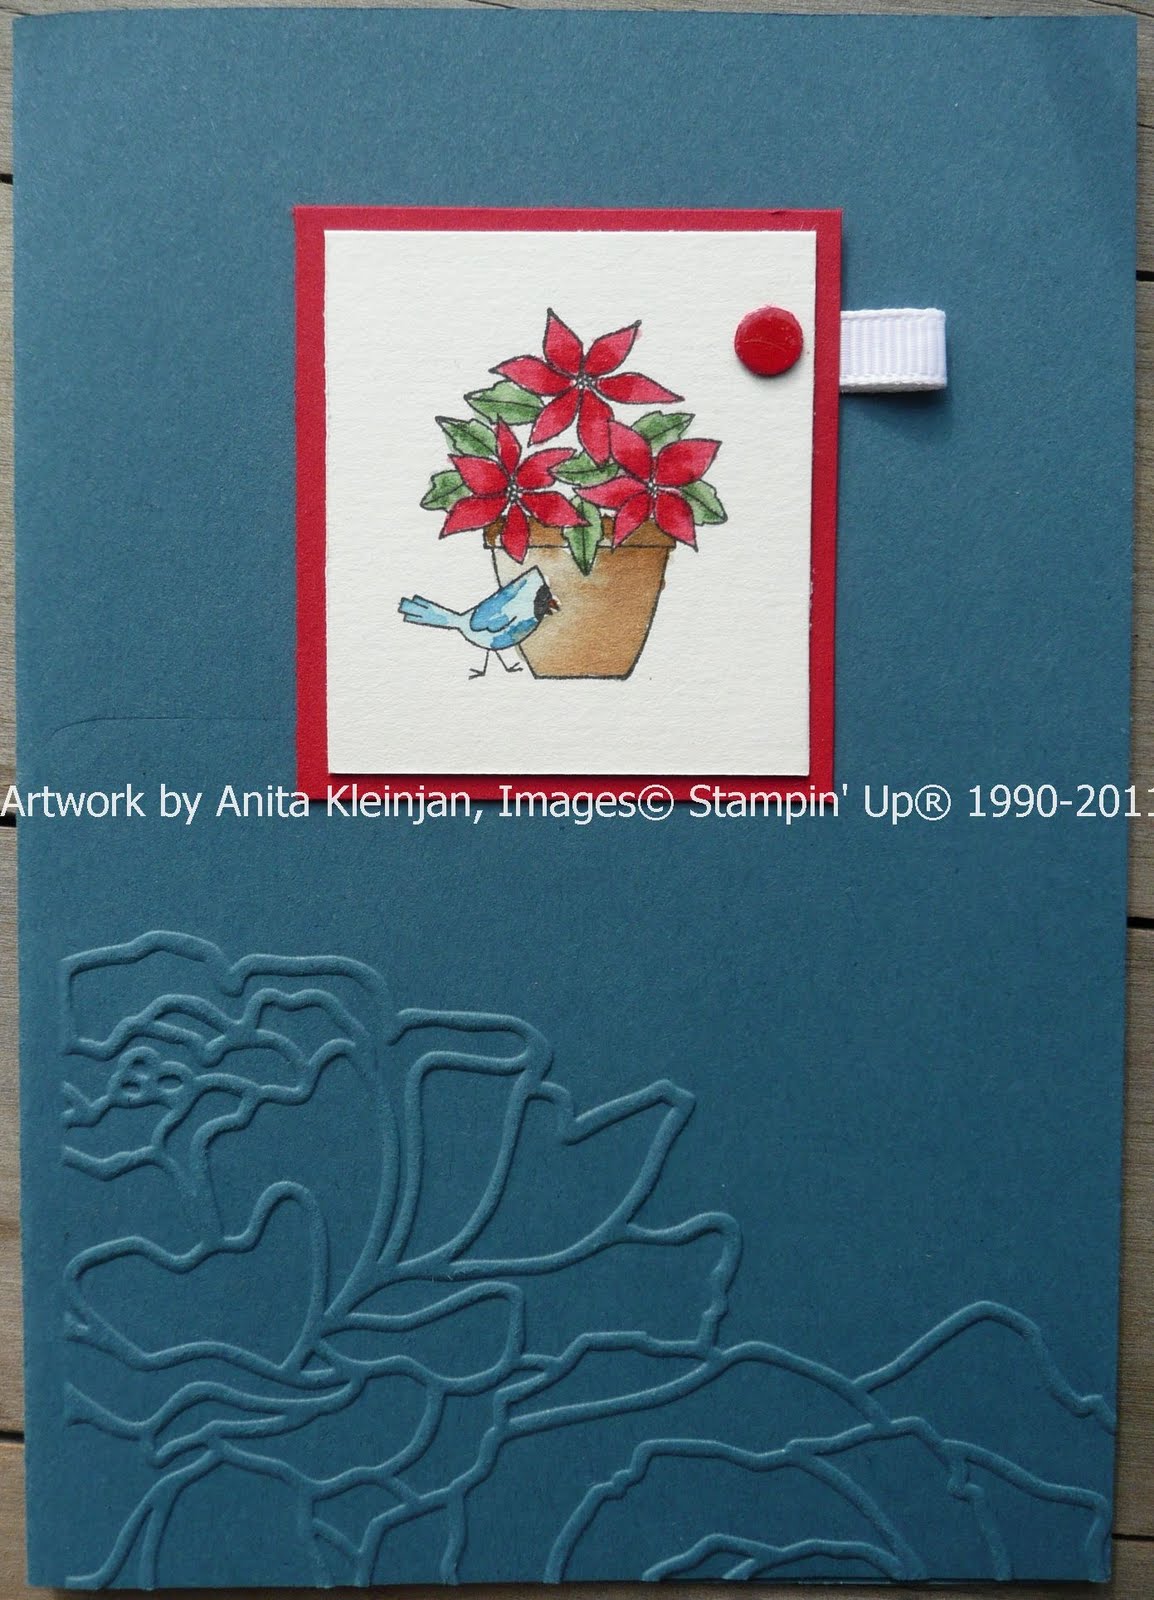
This Friday evening my daughters school will be having an Art Auction and Music Recital.  Here's a sample of a Gift Card Folder I am giving to the cause.  These folders have been around for a  long time, initially inspired by Makeesha Byl's artwork, but they are always such great gifts. I have used the retired stamp set "Soft Summer" here.  It promises to be a great evening, where we will get to enjoy the senior music students perform their exam pieces and then bid on art work as a fundraiser for the school.  
These card folders make wonderful gifts for Christmas.  The cards are blank on the inside, so they can be filled in for any occasion. 
I have coloured the flowers using ink and a blender pen. All the blossoms are starting to appear here in Hawkes Bay and this stamp set is such a timeless one and reminds me of the blossoms. It's a joy seeing the soft pink blossoms when driving around. The change in season always reminds me of new beginnings.
 Well that's all I have time for this time.
Thanks for stopping by

Thursday 1 September 2011

Bright and Cheery flowers to welcome the New IBC

It's still available in the NEW Idea Book & Catalogue, the stamp set Flower Fancy and the Square Lattice embossing folder used here. I use this stamp set so much, and there's not really a colour ink it doesn't suit.  Some people have trouble imaging how to use this stamp set, but I always head for it and love exploring new colour combinations to use with it.  I demonstrated this card at a workshop and everyone enjoyed the end result.  The lattice embossing folder is a classic design and can be used in so many ways.  
I got introduced to two step stamping very early on in my Stampin' Up life and I still find it a striking stamping style.  I love using Whisper White  ink on top of colour.  I designed this card with many different stamping techniques, as I like to pack as much into a workshop as possible.  I have used the white uni-ball Gel Pen that Stampin' Up! sell to put faux stitching around the cut out Top Note edge.  Sewing is so easy this way.
I have stamped the outline of the flowers and then 'fussy-cut' them out. I then sponged the edges.  These flowers are mounted using demensionals and a large brad in the centre.
Thanks for stopping by

Sunday 28 August 2011

Emboss Resist on DSP

Greenhouse Gala has been a real favourite paper of mine.  I have not used it all yet either. Why do I find it so hard to cut into paper I love so much?  I must be more diligent to use things I love. I so enjoy using the Emboss Resist technique and using white embossing on DSP is one of my favouites.

I have stamped the grasses on my Whisper White cardstock here and then embossed my daisies using VersaMark and white embossing powder on the Top Note cut out of DSP.  I have then sponged Pear Pizzaz ink around the daisies.  This was a very quick card to make but the simple design is striking.
The bee is from the Nature Walk stamp set and watercoloured on watercolour paper with my aquapainter and die inks and then 'fussy-cut' out. I have mounted it using dimensionals.  Hope you are having a great weekend.
Thanks for stopping by

Thursday 25 August 2011

Bush Scene using Retired stamps

It's long overdue for me to post a blog entry. Thanks for your patience. I have embarked on a new chapter in my life and find myself a student again and also with a part-time job. Wow! The past weeks have been a very big exercise for my poor brain.  I keep asking myself, am I too old for this?  Well I have survived so far and am in fact enjoying my lectures very much and have sat my first exam this week.
So here's to a blog entry using retired stamp sets to honour our retiring list for the month of August as we farewell our current Idea Book & Catalogue. You have a few days left to get orders to me before it's too late. So don't miss out on getting those stamps and goodies you can't do without and that won't be available again.
I made this card for my son's birthday.  He loves to go hunting and enjoys the outdoors.  So think, think, what can I create with so few male stamps?  Well a little imagination and I realise we have plenty of stamps for our Kiwi blokes.  A fern, and a sprey of dried grasses, which look exactly like the ones down our country block, will do the trick just fine thanks.  
The wonderful retired Autumn Spice paper with it's wonderfully rich warm autumn colours and leaves make it perfect for this card. The sun looks warm but in the bush it's a chilly evening.  How our senses are warmed looking at the wonderful array that nature has for us to enjoy.
I sponged this card, as always it's a last minute 'have-to' rush job!  I have one to make tonight for a 50th party tomorrow night, but a blog entry comes first. Whew! have my priorities right.
I enjoyed catching up with all of you and am hanging out for a craft time, to share some new projects with you.  The new Idea Book & Catalogue products are available after 1 September, 2011.
Thanks for stopping by

Sunday 24 July 2011

French Foliage with Autum Spice

I fell in love with this stamp set when it was first released in the Autumn-Winter mini catalogue.  I have just acquired it and love it. The product in this catalogue are only available until the end of the month, so don't forget to place your order before the end of the month. I have used images from this stamp set in a layered fashion to give it this vintage look.
I have used the wonderful Autumn Spice DSP also available in the Autumn-Winter Mini Catalogue.  The colours in this DSP are Old Olive, Cajun Craze, More Mustard and Early Espresso.  All wonderful colours to use with this stamp set. Here I have also embossed some More Mustard card stock with the Vintage Wallpaper embossing folder and sponged Early Espresso ink on it.
I have used the rock 'n' roll technique when stamping my leaf.  I first fully inked it with Pumpkin Pie ink and then inked the edges with Cajun Craze.  It has stamped up looking more natural this way. I am looking forward to finding some time to make more creations with this stamp set.
Thanks for stopping by

Wednesday 20 July 2011

Top Note Booklet

Here's a wee notebook I made using the Top Note die.  Fold card stock in half and then place folded edge just in from the cutting line on the long edge of your top note die.  You will end up with a lovely shaped piece of card stock to use for a booklet, or card. I have used the stamp set 'Nature Walk' to embellish my notebook. This stamp set, lends itself to so many styles and colour uses.
I have stamped the butterfly with Staz On ink on watercolour paper, and coloured it in.  I then inked the entire image with Versamark ink and clear embossed it.  I like this finish as it gives a greater depth to the colours.The booklet front is retired Sage Shadow card stock and I have sponged lots of Always Artichoke ink on the edges. Then using Always Artichoke ink also stamped the images, with a little Cherry Cobbler ink for the flower heads.
I also stamped the back of my booklet to match, and gave it a signature to make it an authentic piece of artwork.
The inside has cut pieces of exercise book so that it has lined paper to write on. I put them through the Top Note die and then hand cut it on the perforated edge, this makes it a little smaller than the outside and fits nicely inside the card outer. Staple in place.  Each edge is sponged and also stamped in Always Artichoke ink with the bee in this stamp set.
Here's a lovely wee idea to while away a few hours in this wintry weather.  Make a few and put them away in your stash for those special gifts.
Thanks for joining me.

Sunday 17 July 2011

Chalkboard Daisies

This card has been a long time in coming to be blogged.  When I first saw the chalk board technique on my Splitcoast stampers newsletter, I just had to give it a go.  I love how this stamp, 'Inspired by Nature', lends itself to this technique so well. I love the finished effect that chalk board gives. 
The background cardstock has been Silver embossed using the daisy image.  I have then repeated the same image onto black card stock using White Pigment ink.  I then coloured on the dried white image using watercolour pencils, blending the colours as I went.
I then made a matching inside to my card.
I hope this gives you some great craft inspiration. Enjoy your weekend.  I caught some lovely sun yesterday.  Good Vit D for free. Sorry those who are cold and sick of the rain, but I just had to share.
Stampin Supplies:-
Stamp sets - Inspired by Nature, Close as a Memory (retired)
Card Stock - Basic Grey, Rose Red, Black
Ink - White pigment, Versamark
Other - Silver Embossing Powder, Heat Tool, water colour pencils
Thanks for stopping by

Thursday 14 July 2011

Inlaid Buttons

I was given so many lovely birthday cards this year but the one that really caught my eye was this Inlaid Buttons card made by my sister.  I just love this card.  I have finally gotten around to photographing it and posting it.  
My sister has a buttons embossing edge which matches in with the Stampin' Up! Buttons #5 die perfectly. I think the buttons overlaid on each other and set on dimensionals and some string gives this a special finish. 
You can see here, that a little sponging adds some definition to the embossed buttons on the edge. Love those sponges.   Hope you feel all inspired to go and give this a go too. 
Thanks for stopping by.

Gift with Purchase - July Promotion

Stampin' Up! love to treat us to special deals and this month is no exception.  
Spend $120 on your choice of Stampin' Up! products and receive an exclusive product bundle for FREE. 1- 31 July, 2011
Receive: One spool White 1/4" grosgrain ribbon with repeating flower designs.  Approx. 13.7mtr.
48 flower buttons, 16 each in 3 colours (Daffodil Delight, Melon Mambo and Pacific Point). Approx. 1.3cm Value: $37.50
 
Contact me today to get your free exclusive bundle.  
Thanks for stopping by 


Sunday 10 July 2011

Hedgehog Wall Hanging

I love this Hedgehog image from the stamp set Fun & Fast Notes.  I have stamped it on water colour paper with Staz On ink and given it the smallest amount of colour to give it character.
I had fun getting this little fellow together. I thought it would make a great wee painting to hang up and so I have mounted him on card to look like a hung picture. I have also dry embossed the card using my Fiskars cutter groove and Stampin' Up! bone folder.

The colours I have used here are Certainly Celery and Daffodil Delight.  I love this new yellow and it works well in all colour families. 
Thanks for stopping by

Saturday 25 June 2011

Razzle Dazzle in Naturals

Here's another colour combo using the 'Razzle Dazzle' stamp set.  Not a colour scheme I would have thought to use with this stamp set but I had seen this colour scheme on a blog, and wanted to try it out. (I but don't remember where I saw this combo, let me know if it's you, so I can acknowledge you). My sister has this stamp set and so a play date was organised.
I am very happy with this colour combo and how this turned out. 
I have used markers to ink up this image.  I love the label "It's good to dream". I hope you feel inspired.  Thanks for your patience in waiting for this blog entry, life has it's moments, but as the card says it's good to dream.
Stampin' Supplies:- 
Stamp set: Razzle Dazzle
Card stock: Soft Suede, Very Vanilla, Kraft
Ink: Markers: Kraft, Chocolate Chip, Soft Suede
Other: Matt Pack, Linen thread,
Thanks for stopping by

Friday 10 June 2011

Birthday Celebrations

Time to update my blog.  I have been enjoying a visit from one of my sons, so blogging hasn't been happening. We also got to celebrate our favourite daughters birthday recently (we only have one, so it's fun to say that). When you turn 15 it's fun to decorate your cake with a theme and you can get away with using "Pet Shop's" just for fun.  Miss 15's nick name is "Bee", hence the "Bee" theme.We were out shopping and saw this "Pet Shop" that had a bee hive and bee in the set, along with a wee ladybird.   Perfect excuse to be purchased for a cake decoration and can then be added to the 'stored' tin of "Pet Shop's". Here's the cake Miss 15 made and decorated.
The card followed with the 'bee' theme we started on the cake, this gave me another opportunity to use the wonderful wee bee stamp in the "Nature Walk" stamp set.
 
I brayered using So Saffron and Certainly Celery ink and then stamped the grass on top.  I water coloured the flower and bees on water colour paper and cut them out and then attached them.  Part of the top note makes a lovely side tab.
This card folds open differently then the usual card style. This is the inside of her card. I love how you have 3 panels to add sentiments and loving words to. I have made a matching centre panel to match the card front.
I finally chopped into my last sheet of favourite DSP (retired). Love this paper. The wee 'bee' is from the Sale-a-bration set "Sweet Summer".  The greetings are from the "Create a Cupcake" set. I had fun making this card.  Hope you enjoyed it too!!

Stampin' Supplies:-
Stamp sets:- Inspired by Nature, Nature Walk, Sweet Summer, Create a Cupcake, Every Moment.
Ink:- Certainly Celery, More Mustard, So Saffron, Riding Hood Red, Old Olive
Card stock:- Old Olive, Early Espresso, Always Artichoke, Cherry Cobbler, Whisper White, Kiwi Kiss (retired)
Thanks for stopping by

Wednesday 1 June 2011

All a Glitter - just DAZZLING

Don't you just love surprising someone with a card that has a special effect that you know they love.  I am not such a glitter girl, but I had a birthday card to make for a friend who shares the same birthday as me.  So I decided to try this glitter technique that we got to learn from Bron at Regional Training in Wellington.

This card did give the WOW factor I had hoped for.  My recipient was delighted.  When you have such a great tile with so much character the rest of the card can be kept quite simple. Don't you just love those "Lots of Tags" Sizzlits dies.  A little ribbon and pearl and you are complete.
I hope you can see how lovely this tile has turned out, photo's never really do full justice.  There's nothing like seeing a card like this is real life.
Stampin' Supplies:
Card stock: Early Espresso, Cherry Cobbler, Whisper White
Inks: Pear Pizzaz (love this colour), Cherry Cobbler, Early Espresso
Other: Scor pal, Heat and Stick powder, Dazzling Diamonds, Heat Tool
Thanks for stopping by

Saturday 28 May 2011

A Flower For All Seasons - Poinsettia

Here's the final installment in this series using the images in the stamp set "A Flower for All Seasons".  This lovely poinsettia has been coloured a lovely rich red, but they are also grown in cream. Did you know that?  I used to have a wonderful red Poinsettia under my kitchen window, when I lived in Perth, which flowered all year round.  We could grow such different plants there because of the lovely warm climate.
I have used only a corner of the embossing folder "Manhatten Flower" on the bottom of this card front.  This keeps it simple and has quite a striking effect.
I made my brad using a piece of card stock punched with a 1/4" circle punch and added crystal effects to it.  Quite effective isn't it? There's an option you may not have thought of if you don't have a matching brad.
Stampin' Supplies
Card stock: Not Quite Navy, Real Red
Inks: Real Red, Garden Green, Soft Suede, Crumb Cake, Not Quite Navy and Bashful Blue
Other: Manhatten Flower embossing folder, Big Shot, Water colour paper, Aqua painter, Whisper White 1/4" grosgrain ribbon
Thanks for stopping by

Thursday 26 May 2011

A Flower for All Seasons - Sunflower

Well I did say I would post a card I had made with all four lovely images in "A Flower for All Seasons" stamp set.  So here's card number three. These sunflowers remind me of the year we planted heaps of sunflower seeds at the back of our property and were rewarded with a wonderful patch of really tall sturdy sunflowers.  They really are a very dramatic flower in a group planting.  Someone planted a "maize" with sunflowers in Upper Hutt one year.  What a wonderful idea.
I love making paper buttons using my Sizzlits Buttons #5 die.  Check out my earlier post on how I did this.
I love the wee detail of the ladybird climbing up the side of the pot. Terracotta pots develop there own character with age.  Cajun Craze is the replacement colour to Really Rust which I used to colour this pot.
I love small cards, they are so handy to have, wee notes that say so much.  I have left these cards with no greeting on the front, I can always add one later or use them for any occasion.
Stampin' Supplies
Card Stock: Garden Green, Soft Suede, Very Vanilla
DSP: Woodland Walk
Inks: Daffodil Delight, Soft Suede, Cajun Craze, Real Red & Garden Green
Other: Scallop Edge punch, Buttons #5 die, Big Shot, Crystal Effects, Linen Thread
Thanks for stopping by